Sunday, March 31, 2013

Quarterly Update

Back in January, I made 13 resolutions for 2013. We're now a quarter of the way through the year, so it seems like a good time to see how I'm going so far.

Fitness
1. Run 500km this year - As of this week, I have run 135.5km. This is 10.5km more than a quarter of the way to my goal, so this is good! I've gotten to the point where I enjoy running, even though my daily run is still only between 3.5 and 5km. I have had one week where I ran all 5 days of the week, but then got sick so haven't sustained it.

2. Cycle 1600km this year - So far I have cycled 366km. This is 34km less than a quarter of my goal, so I need to pick up my game!

3. Do push-ups at least once a week - I have done this so far! Most weeks I do push-ups twice a week, even, always in lots of 30. So far I'm up to 540 push ups for the year, which is 18x.

Work
4. Clear out my email inbox every day - I was going really well with this one before teaching started. I was down to 30 emails at one point! Because of this, I have been more on top of responding, writing things down in my diary and then deleting emails, and so on. Once teaching started it all got a bit hectic, but I still try to find the time to do this regularly. I currently have 89 messages:

5. Unsubscribe from email lists - I got on that pretty early in the year and have managed to avoid signing up for new things, for the most part. But when I'm busy, if I get a stupid newsletter I don't want, I tend to delete it straightaway rather than going through the steps of unsubscribing. Still need to keep this up!

6. Turn my PhD into a book and get it published - I write every Monday morning and am about halfway through the mammoth task of turning my very academic PhD into a publicly accessible piece of writing. I'm happy with how I'm going so far!

Crafty
7. Turn the spare room into a craft room - I did that in the holidays, though it still needs some key things (like a futon or spare bed for lounging on and also for guests). I have spent rather a lot of time in there this long weekend, making curtains for the bedroom window.

8. Finish crocheting the blanket I started in early 2012 - I have added two more rows to this blanket, and will probably finish it off some time this week.

9. Sew curtains for the bedroom and hallway, and possibly other rooms - see above for bedroom curtains. Due to a long gap between buying fabric and making curtains, as well as slightly shonky planning, my intention to get 4 curtains out of this fabric failed - we'll get three, which means I can't really use them for the hallway window. So, still need to work on that.

Garden
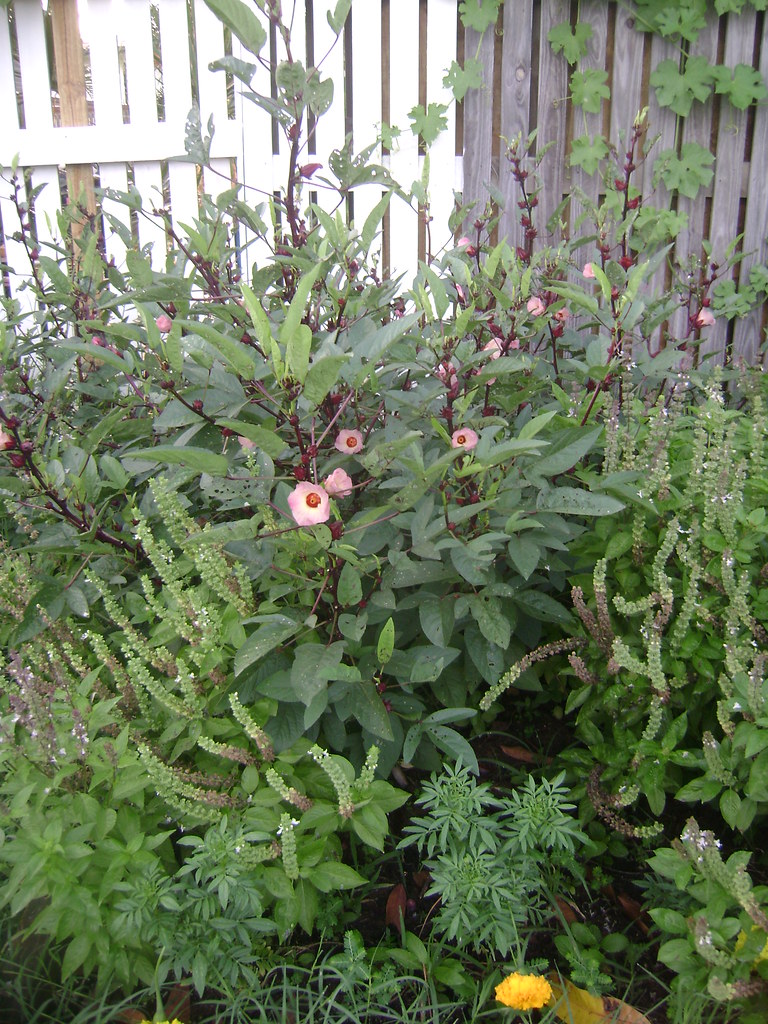
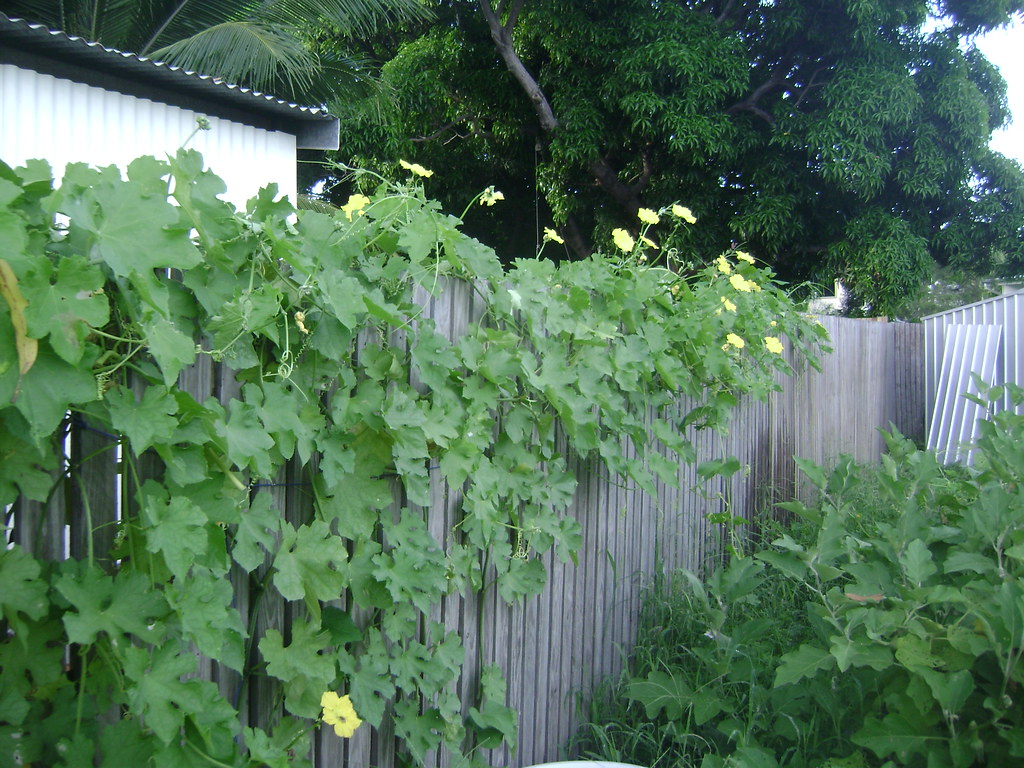
10. Plant more flowers amongst the veggies to attract bees - two weekends ago Andy started a bunch of veggie seeds in seedling pots, so the following weekend I planted some sunflower, nasturtium, marigold and echinacea seeds. He's not sold on the idea of flowers in the veggie beds, but this will happen!

Home and Life
11. Keep track of everything we spend for at least two months this year - we did this in February. I haven't had a close look at it yet to see where our money goes, but at least we did the hard bit!

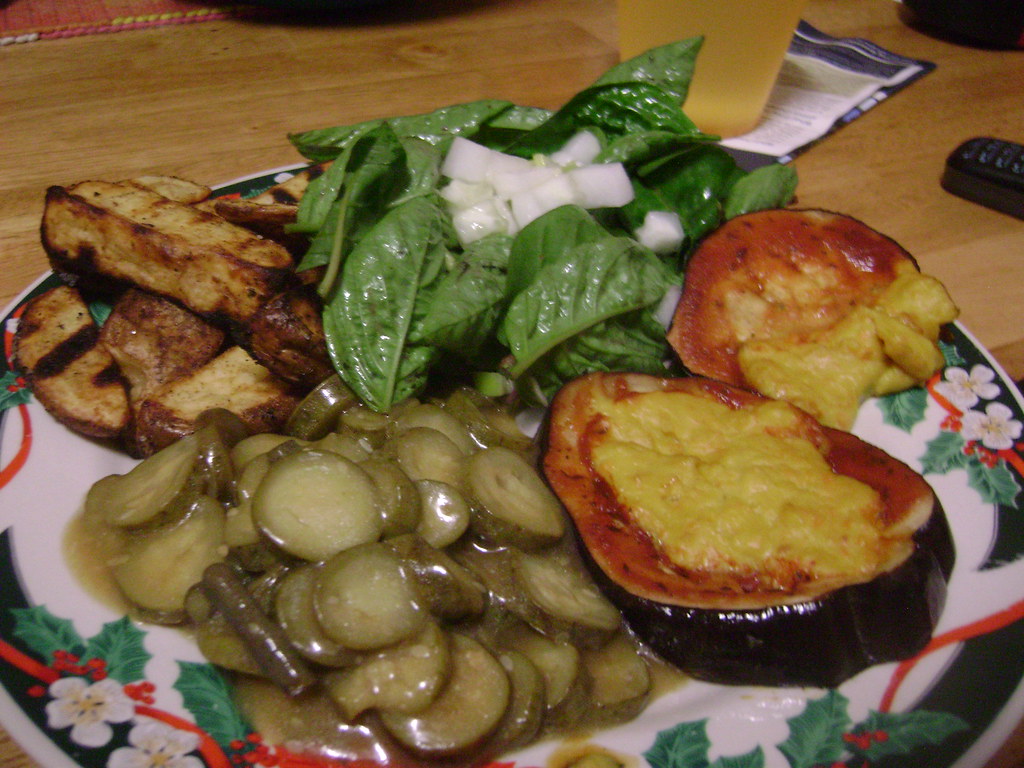
12. Do more food prep and meal planning on the weekends - we have had lots of success with meal planning, and I definitely intend to keep it up!
Example of meal planning success: Channa sag paneer with chappati

13. Help out with at least three vegan outreach stalls - I have done one so far, at the uni O Week Market Day, and will be contributing lots of baked things to the Townsville Vegans Worldwide Vegan Bake Sale in April. On track!


Saturday, March 16, 2013

Queensland Jam

Rosellas are a type of parrot. They are also a type of hibiscus flower. This post is about making food from one of these. Can you guess which one? 

We get monthly "what to plant" emails from the website Gardenate.com, and throughout the summer they got a bit sad. November: Plant basils, sweet potato, rosellas. December: Plant basils, rosellas. January: Plant rosellas. We're back into more diverse planting season at the moment, but we're also in the midst of the rosella harvest.

We have 6 rosella plants in our garden, and they are a very lovely plant, I think. They are all at different stages of development, and some took a while to become productive.

After the flower opens, the petals fall off and a red bud-like calyx forms, sort of like a rose hip. This calyx is actually what you harvest. The red "petioles" around the calyx are super tart, and can be turned into jam, cordial, syrup, and those kinds of things. They are also dried and turned into tea - most famously, Celestial Seasons Red Zinger tea, but usually they are an ingredient in most commercial lemon-flavoured teas. Or if the seed pod is removed intact, they are poached and sold for an awful lot of money as "blooming" flowers to add to a glass of champagne. 

We've been harvesting, slowly at first, since December. I made a tiny batch of cordial at christmastime, and I think I will do some again because it would make really nice cocktails.

But most of the harvest has gone into the freezer, waiting for a big enough batch to make jam. This is the most popular use, it seems, of rosellas, which are also known as the "Queensland Jam Plant" - which begs the question, if you refer to them as the Queensland Jam Plant, what do you call the jam? Queensland Jam Plant Jam? Queensland Jam? 

Linguistic conundrums aside, two weekends ago we had a full freezer bag, plus a big bowl full of fresh calyxes to work with. Let the jam making begin! I used this blog post as my guide (but ended up using far less sugar).

Step 1: separate the red petioles from the green seed pod. I put my frozen and fresh calyxes in a big pot with water, to wash off the bugs, crusty old petals, etc. 

Then I spent the next three hours (I kid you not) peeling them apart. It was a lot of work. The pre-frozen calyxes were actually much easier to separate - they peeled away in one quick move. For my next batch, I will definitely freeze them all before working with them. I will also do a better job of washing the calyxes before they go in the freezer, so I don't need to have them in a bucket of water to process. Seriously, my hands have never in my whole life been so wrinkly.

By 7pm on Saturday I had a sore back, wrinkly hands, a bowl full of seedpods and a bowl full of calyxes. I put the rosella-bits into the fridge till the next day.

Put the seed pods into a pot. Cover them with water. Bring it up to the boil, and let it go for about 20 minutes. My jam, in the end, wasn't as set as I would like. I have heard that cutting the seed pods in half is a better way to release the pectin. Probably easier would be to sort of smash them in the water as it is coming up to the boil. I'll let you know if it works better the next time around. After the seed pods have cooked, strain them off. Compost the pods, save the liquid.

Rinse the jam pot out with clean water. Add the red petioles, and the seed pod-cooking liquid. Bring them up to a boil and let them cook until the petioles have gone mushy. This didn't take too long, once the boil got rolling - maybe 5 or 10 minutes. 

Turn the heat down to very low. Let the jam mix cool slightly. Add sugar. I used about 1 2/3 cups of raw sugar, in about 5 cups of jam mixture. This seems like much less than most recipes call for, which could account for the lack of proper-set. But it tasted good - still lovely and tart, but not face-squeezy. Dissolve the sugar gently into the jam while you taste to see if it needs any more.

Once the sugar is dissolved, bring it back up to a rolling boil. Let it cook like that for 30 minutes (sorry, raw foodies, you'll have to look elsewhere). Set a timer, get a book, turn on the fan in the kitchen and stir it pretty near constantly for the whole time. When the 30 minutes is up, you test for set. It's probably best that I don't give advice on this aspect, because I failed. I put my jam on a cold plate in the freezer, but found it hard to determine if it was gelly because of the rosella-bits. So I just thought, schmeh, and we bottled it up.

A lot of people talk about alternative methods for sealing jam jars - popping them upside down while they cool, putting them in the oven, etc. But I've read things that make me nervous about breaking the Preserving Rules, so we got a gigantic pot to boil our jam jars to properly seal them.

We got four jars, which all sealed properly. When I opened one and found the jam was runny instead of gel-tastic, I was a little disappointed, but then I tasted it. And it tasted really, really yummy. And, because of all the rosella chunks, it is still fine to have on toast - didn't run off!

But, what better to do with runny jam than put it into baked goods? I used the recipe for Raspberry Swirl Pound Cake from Urban Vegan, using (obviously) rosella jam in place of raspberry. 

It was even more delicious with another spoonful of jam on top! 

Luckily, we still have 3+ jars of jam, a freezer bag and a half of calyxes, and 6 still-productive plants, because I have falled head over heels for this stuff!

(PS - I made jam out of the hibiscus flower, not the parrot.)

Friday, March 15, 2013

From the Garden

Practically since we moved in to our house almost a year ago, we have had a semi-productive garden which we've used to supplement our purchases of fresh produce. Now that we've been here a while, it's starting to get really good. Have a look at these meals that centred on the harvest from our own back yard.

This BBQ dinner is eggplant parma with sauteed luffa, potatoes and salad. The luffa was sauteed with lime juice which we were gifted from a friend's tree.

We grew the eggplant, all the salad ingredients - cucumber, basil, tropical spinach and chilli - and luffa. The luffa are a zucchini-like climbing vine which, if you let it get bigger, can be turned into the fancy bath sponges you buy from shops. This is what they look like when they are small.

And here is how they look when they grow.

Another night we made sushi. We used bought rice and seaweed, and condiments for dipping. But we grew all the fillings - eggplant that we marinated, snake beans, and cucumber.

Served with a side of sauteed luffa.
Andy's dad made the chopping board. I reckon her should go into business.
The cucumbers we're growing at the moment aren't your typical green variety. They're called "giant russian" and when I first saw one on the vine I thought we'd accidentally grown a butternut pumpkin!


And these nachos were made with black beans, tinned tomatoes, homegrown capsicum and chillies, and my favourite part...

Home grown sweet potatoes.


So we're not obligate locavores yet, but our locallivory is increasing. I just can't wait until our fruit trees start producing.

Wednesday, March 13, 2013

Peanutty Tofu

Meal planning is going pretty well for us still. Though we have a tendency to fall back on regular favourites - dhal, eggplant pasta, burritos - we have tried out new things at least once a week. Because I do lots of prep on Sunday, even trying out new things isn't too time consuming. Here's a new kind of tofu - deliciously peanutty tofu - that we tried the other week. I found the recipe on Pinterest, but we didn't follow it, so I'll post it here the way we made it.

BBQ Satay Tofu

2 Tbsp. soy sauce
2 Tbsp. sesame oil
2 Tbsp. sherry
750 g. tofu, cut into slices

On Sunday (or just a few hours before), mix the soy sauce, sesame oil and sherry, pour over tofu and cover. Let that marinate for a few hours or a few days.

3/4 c. coconut cream
3/4 c. peanut butter
2 garlic cloves
1 1/2 tsp. curry powder
1 Tbsp. brown sugar
1 Tbsp. lime juice
1 Tbsp. olive oil
1 1/2 Tbsp. soy sauce

Blend these ingredients together until they are nice and smooth to make a sauce. You can do this on Sunday, too, and leave it in a jar in the fridge until you have tofu for dinner.

When you're ready to cook, put the tofu in a baking tray in a single layer. Pour most of the peanut sauce over the top. We put ours in a cast iron baking tray and cooked it on the BBQ, so added the rest of the can of coconut cream to the pan, too. If you're making it in the oven, see how you go and add extra liquid only if you need to. Alternatively, toss the tofu pieces with 1/3 cup or so of the peanut sauce and cook directly on the grill, serving with more sauce.

The beauty of cooking it in the pan is that the sauce went really thick and caramelised, and then we poured the little bit of leftover sauce over on our plates. It was beautiful!

We served ours with a roasted eggplant & snake bean (both from the garden) couscous salad, and a pesto-stuffed butternut pumpkin.

Sunday, March 10, 2013

Meyer Lemon Sherbet

In Australia, sherbet is (correct me if I'm wrong) a fizzy powdered candy which I have never tried. In America, sherbet is pronounced like "sherbert" and means a fruity sorbet-style ice cream with a bit of milk in it. It's sort of halfway between ice cream and sorbet. Why it was given the name "sherbe[r]t" is beyond me.

A few weeks ago, a friend of mine gave us a big bag of Meyer lemons from her tree. We used them to make lemon & sage burgers, added them to dal, and they appeared in other dishes, too, but we still had a bunch left to use. Andy suggested that we make sorbet. I decided to make it a sherbet, because hey, why not?

I googled some recipes, and then just ended up making my own recipe up as I went, tasting and making sense of things along the way. The end result was really extraordinarily delicious, if I can say that without sounding arrogant - tangy, sweet-tart, creamy, zesty, and refreshing.

Meyer Lemon Sherbet

4 meyer lemons (meyer are sweeter than other lemon varieties; if you don't have these, you may need to add more sugar to taste)
1 c. sugar
400 ml coconut cream
100 ml water
2 Tbsp. corn flour
2 Tbsp. water
1/4 tsp. tumeric (optional)

Carefully zest the lemons, avoiding the white pith. If you have a fancy zester, lucky you! Skip to the next step. If, like me, you use a peeler to get the zest, chop it up as finely as you can get it. Juice the lemons. I had 1 1/2 cups of lemon juice. If your lemons are smaller, maybe use another one, or else try it with less and see if you like the taste. You can always add more later.

In a saucepan, combine the coconut cream, 100ml of water, lemon zest and sugar. Heat over medium until the sugar dissolves. Add the lemon juice. Bring it up to just bubbling, taste it and add more sugar if it is too tart for your liking. Mix the corn flour with 2 Tbsp. of water and pour this into the sherbet mix. Stir it in very well, turn off the heat, and if you want your sherbet to be OMGSOYELLOW add some tumeric. Just a little bit won't make it taste like anything but lemons. Let the mixture cool to room temperature, and then chill it in the fridge until it is very cold.

Churn it in an ice cream maker until it has set. If you have no ice cream maker, try these instructions.

Sunday, March 03, 2013

Vegan Picnic

For the past few months, a small group of vegans and vegan-curious friends have been getting together on Saturdays to share food. As vegans are wont to do, we usually over-cater, which is followed quickly by over-eating.

Last Saturday about 10 of us met at a park and did it again. The food was really fantastic - too good, really, because I went home and didn't want dinner.

Belinda made sausage rolls, filled with sweet potato and couscous. Very flavourful, and Andy would have called them a good vessel for sauce.

Stevie and Luc made dips, and they brought crackers and chips for dipping into them. The tofutti-based french onion was to die for, and there was a very yummus-hummus, too.

Deborah brought some pizza scrolls that were hard to stop eating.

Sunny brought fantastically-fluffy wholemeal pancakes, and some jam to spread on them.

And I made some Ultimate BBQ tofu, using the recipe from Vegan Dad that I found on the Moody Noodles' blog.

It was worth waving the flies away for all of this delicious food, and good company too.

If you're in Townsville and interested in meeting up, we do this on the last Saturday of each month. Find the details on the Townsville Vegans facebook page.